
Steps to take this fall to help prepare your tree for winter.
Fall is a great time to get outside and assess your yard and landscape, including your newly planted trees. In fact, that is exactly what this post is geared toward- fall tree care. Giving your trees a bit of extra love now will benefit them greatly in the long run, allowing them to settle in for winter and wake up refreshed and thriving in spring!
Here are some simple and enjoyable fall tree care tasks to keep your new trees happy!
Step 1. Don't put the hose away just yet!
It may be tempting as you're doing fall cleanup to pack the hose or watering bags away, but it's much better to be patient and leave them out. This way, you can easily access them when you go to water your newly planted trees this fall.
Fall is not a time to let up on watering just because the temps are starting to dip down. We recommend continued routine watering throughout fall, and don't skip the evergreen trees. According to the Chicago Botanic Garden, fall tree watering should include your newly planted evergreens, too.
How to Water: Follow the 1-1-1 Rule
Simply water 1x each week for 1hr on a very slow trickle of the hose in the absence of 1" of rain or more.
To do this, place the hose at the base of the tree's trunk and then turn your hose on so that the water is just barely trickling out of it. Let the hose run for 1 hour. The idea is that the water will slowly percolate into the tree's root ball, adequately watering it and not spreading out into your lawn.
Do not water longer than 1 hour even if it's been very hot that week (yes, some fall days in Illinois can be quite warm). You do not want to overwater your tree. This is easy to do! If you use a slow-release watering bag, it's pretty much the same thing; just fill it 1x each week. Not more.
|
Important Reminder: Account for Rainfall One important thing to keep in mind with your weekly fall watering is the amount of precipitation you receive each week. An easy-to-use rain gauge can do the trick, or a quick online search can give you that answer, too. Our rule of thumb is that if it rains 1" or more in a week, let up on watering, and then resume watering the following week. Overwatering can be just as detrimental to the health of your new trees as underwatering- sometimes worse!
|
When to Stop Watering in Fall: End of November
Around the end of November, which is around the time the ground begins to freeze, is a good time to stop watering and put the hose and watering bags away and into storage for the winter.
Do Some Digging: Check the Soil
If you're ever in doubt about when to water, be sure to check your tree's soil. First, find the tree's drip line. The drip line is where the branches overhang at the widest point. For newly planted trees, this will be at the edge of your mulch line. Then, go straight down from there and dig down about 6". Use your hand or a garden trowel to dig into the soil. Once you have dug down 6", check the soil with your hand. Ideally, you should be able to roll the soil into a ball, and it stays that way. That is perfect, and you are experiencing tree watering success!
If it is dry and crumbly, however, your tree needs water! If it's oversaturated, it will run through your fingers, and in that case you need to let up on watering for the week.
Be sure to give your new trees one last good drink of water towards the end of November. Your new trees will thank you!
Step 2. Protect the trunk!
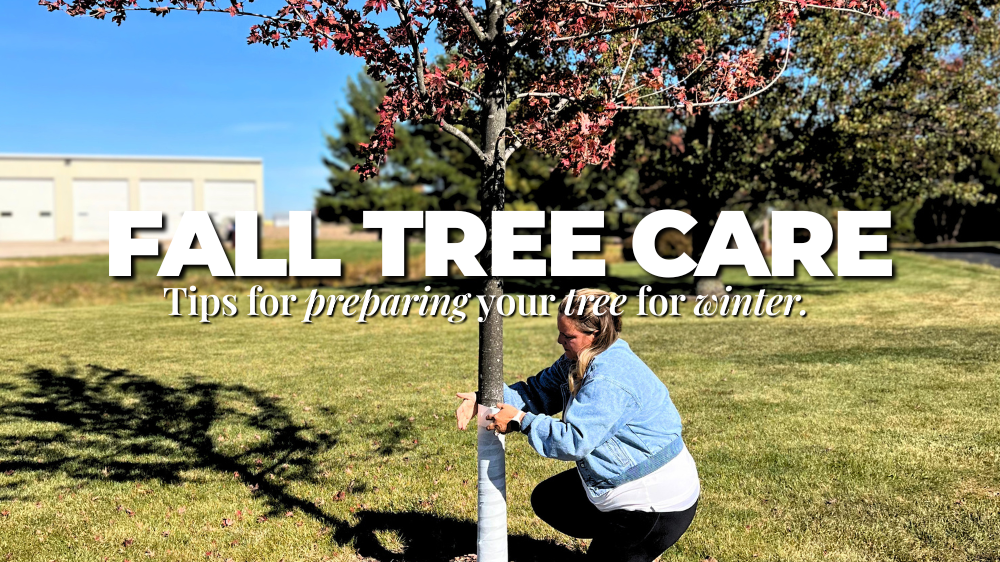
Protect your tree this winter and wrap its trunk! This applies to all single-trunk deciduous trees.
Did you know a major threat in winter to newly planted trees is sunscald and frost crack? Frost crack occurs in the winter, and sunscald can happen anytime.
💡 So what is frost crack and sunscald?
Sunscald occurs when the tree's trunk experiences sudden increases in extended sunlight exposure, which can kill off tissue cells just beneath the surface of the outer layer of bark. The area can later appear dark and sunken, making the tree more susceptible to frost crack in those areas, and the bark will then peel off in those spots.
Frost crack can occur during the freeze-thaw cycles we experience during the winter months here in Illinois. In winter, it will snow, then as temps rise, the snow will melt, and the tree will drink the water up quickly. Then, at night when the temps dip back down below freezing, the water in the trunk will freeze and expand. This freeze-thaw cycle can repeat itself many times throughout the winter months. The expansion of the trunk can cause splits in the trunk and sometimes can be seen in larger branches. These vertical splits in the wood can be unsightly but are not usually fatal to the health of the tree.
The good news is both will heal on their own, and it's recommended that if your tree does experience either, you do not try to paint over it; just let it heal naturally, and it will recover over time.
Prevention: Take Action & Wrap Your Tree
To prevent this, however, we recommend wrapping your tree's trunk. White tree wrap is best- the kind that looks like white medical bandages- because it reflects light and keeps the trunk nice and cool. All newly planted single-trunk trees can benefit from it. Even hardwood trees can benefit because they have not fully developed a thick outer layer of bark yet. So wrapping them up for winter when they're young and vulnerable provides an extra layer of protection against fluctuating temperatures and other potential damage.
Tree wrap can be purchased at most local hardware stores, and it's available on our website for our customers within our service area.
How to Use Tree Wrap: From the Root Flare to the Lowest Branch
To use tree wrap, simply take one roll per tree and begin working your way up. Start at the bottom of the tree's trunk - at the root flare of the tree, which should be exposed and away from the mulch ring. Wind it up the tree, overlapping each layer, and stop once you reach the lowest branch. Leave it on throughout fall and winter and then take it off in the spring once everything has thawed back out.
When to Use It: End of November to Mid-late April
Put the wrap on around the end of November. Then, be sure to remove the wrap as soon as things thaw out in spring, which is usually around mid-to-late April. If left on for too long, it can become damp and encourage disease and pests to harbor beneath it.
Use tree wrap for the first few years as the tree works on thickening up its bark.
Step 3. Replenish Mulch!
This last step is easy and doesn't take mulch thinking. See what we did there?
What you'll need: Mulch
- (1) 2 cu. ft. bag of natural brown mulch - or the mulch of your preference from any local hardware store
- Scissors (not needed but recommended)
- A rake (not needed but recommended)
- A pair of gardening gloves (not needed but recommended)
How to Mulch: ... and how not to mulch
Put on your gloves, and using your scissors, cut the bag open on one end. Gently tip the opening in the bag of mulch toward the ground and pour it out, going around the base of the tree. You can use your hands to help pull the mulch out of the bag and spread it out. This is where the gloves might come in handy.
Next, grab that rake! Rake the mulch out so it's in a nice, even layer. If you don't have a rake, simply use your hands for this step. You want the mulch to be about as wide as the drip line of the tree (where the branches overhang at the widest spot), and about 2"-3" thick all the way round.
|
How NOT to mulch: Do not mound the mulch up against the trunk like a volcano. Instead, you want it to form a bit of a moat. The idea is to keep the root flare exposed, leaving an area where you'll need to place your hose for watering.
|
Replenishing your mulch in the fall will help insulate your tree's roots for winter and help the tree retain moisture.
Friendly Reminders!
Repeat this checklist each fall for the first few years as your new trees establish. A little TLC in the beginning will benefit your trees BIG TIME in the long run.
- Do not overwater: Follow the 1-1-1 rule. Do this throughout spring, summer, and fall for the first few years after planting.
- Check the soil: If you're unsure about when to water, dig down and feel the soil to see if your tree needs water or not.
- Wrap the trunk: Do this in fall & don't forget to remove it in spring. Do this for the first few years after planting.
- Replenish mulch: This can be done in the spring, too! & DO NOT mound it up against the trunk.

🍃 For extended tree care for long-term tree health, please reach out to a local, certified arborist. If they can get eyes on your tree at least once a year, your tree will be set up for success.
📍 You can find a trusted arborist in your area right here.
💡 For other tree care inquiries, head to our knowledge base where you'll find answers to our most popular FAQ's.
💦 Lastly, you can always refer to the downloadable instructions, which are available right here.


.png)